
Why is Content Filtering Important?
Web content filtering is a critical element of a comprehensive information security strategy.
In conclusion, web content filtering is an important security control that helps protect the organization’s network, data, and users from a variety of online threats while ensuring compliance, productivity, and efficient use of resources.
Malware Protection By blocking access to known malicious websites, web content filtering can protect an organization from threats such as malware, ransomware, phishing attacks, and other online threats.
Compliance Many organizations are subject to regulations that require certain types of content to be blocked. For instance, healthcare and financial organizations often must comply with strict data privacy regulations. Web content filtering can help ensure that employees don’t inadvertently violate these regulations.
Productivity By restricting access to non-work related websites (like social media or streaming services), organizations can limit distractions and increase productivity.
Bandwidth Consumption Streaming media and downloading large files can consume a lot of bandwidth. By filtering web content, organizations can ensure that bandwidth is used more efficiently.
Liability Inappropriate content, such as material that is offensive or even illegal, can expose organizations to liability. A good web content filtering solution can help mitigate these risks by blocking access to such content.
Data Leakage Web content filtering can prevent unauthorized upload or sharing of sensitive data, thus preventing data leaks.
Control and Visibility It provides organizations with control over what employees can access online and gives them visibility into their online activities, which is crucial for understanding and managing risks.
Microsoft Defender For Endpoint
Microsoft Defender for Endpoint, previously known as Microsoft Defender Advanced Threat Protection, is a unified platform for preventative protection, post-breach detection, automated investigation, and response. It provides advanced, real-time threat protection and post-breach detection using advanced machine learning algorithms, behavior-based detection, and big data analysis.
Defender for Endpoint is available via several different Microsoft licenses. The following licenses:
- Microsoft Defender for Endpoint P1/P2
- Microsoft Business Premium
- Microsoft 365 E3
- Microsoft 365 E5
Defender for Endpoint provides a basic content filtering solution that can provide a good solution for organizations not using another approach. Malicious websites and websites that need to be blocked for legal and compliance reasons can be blocked.
How to Enable Content Filtering in Defender for Endpoint
Content Filtering can be configured via the Microsoft 365 Defender Portal (https://security.microsoft.com/).
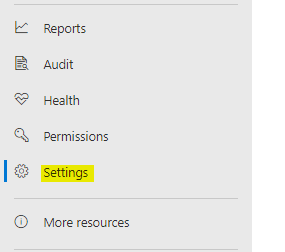
Navigate to the Settings page
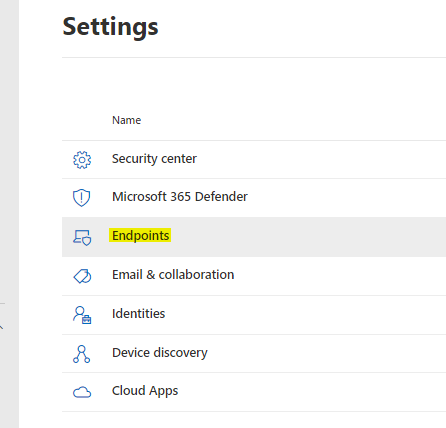
Select Endpoints from the Settings menu.
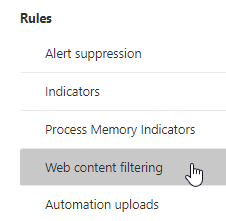
Navigate to the Web Content Filtering section.
On the Web Content Filtering page, you can Add a New Policy, Delete a Policy, or edit an existing Policy.
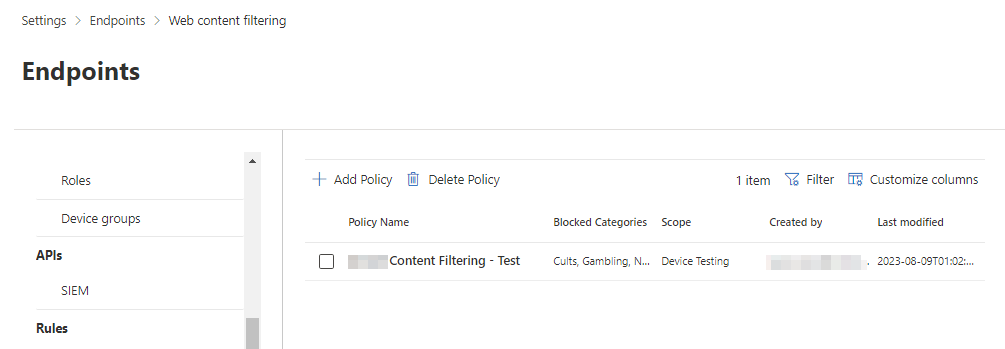
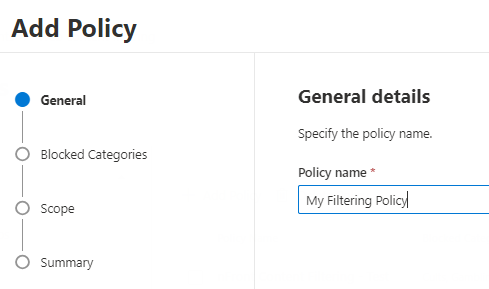
Add a new Policy, and give the policy a name.
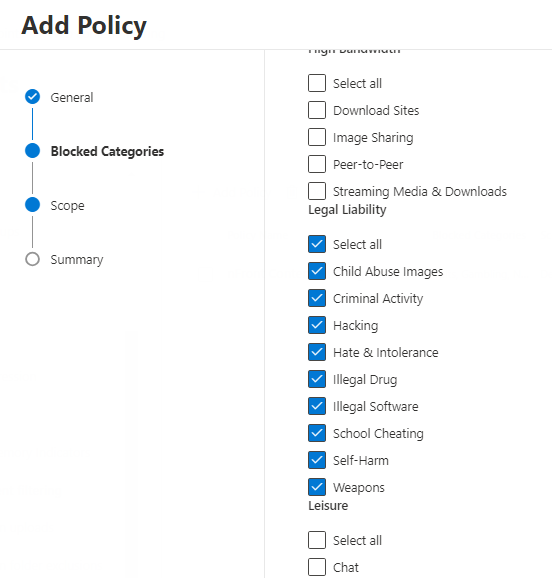
On the next screen, select the web categories you want to block.
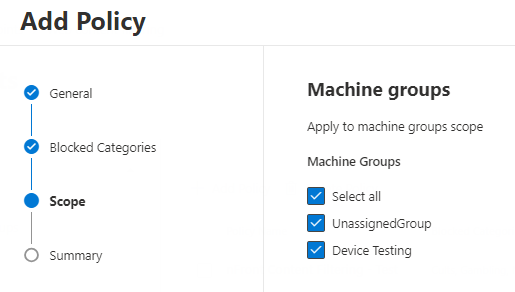
On the next screen, define the scope of the policy. Select the Machine Groups to apply the policy. By default, you’d have the UnassignedGroup available.
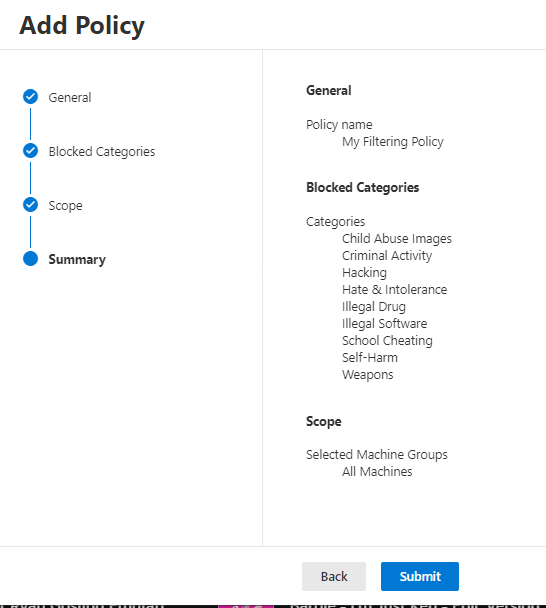
On the next screen you’ll have a summary of the policy. Click Submit to create the policy.
It will take about an hour for the policy to begin to apply to machines.
Testing Policies
After about an hour of creating a policy, you can begin testing the policy. On the device the policy is applied to, you can open a browser and attempt to access a website in the blocked categories.
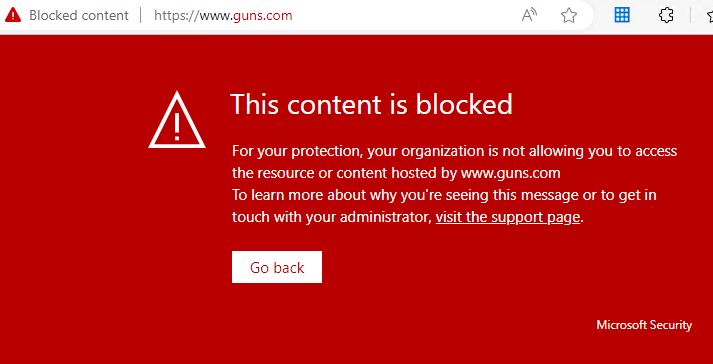
Microsoft Edge shows the following type of Block Message
Google Chrome will display a more basic message with a 403 error message.
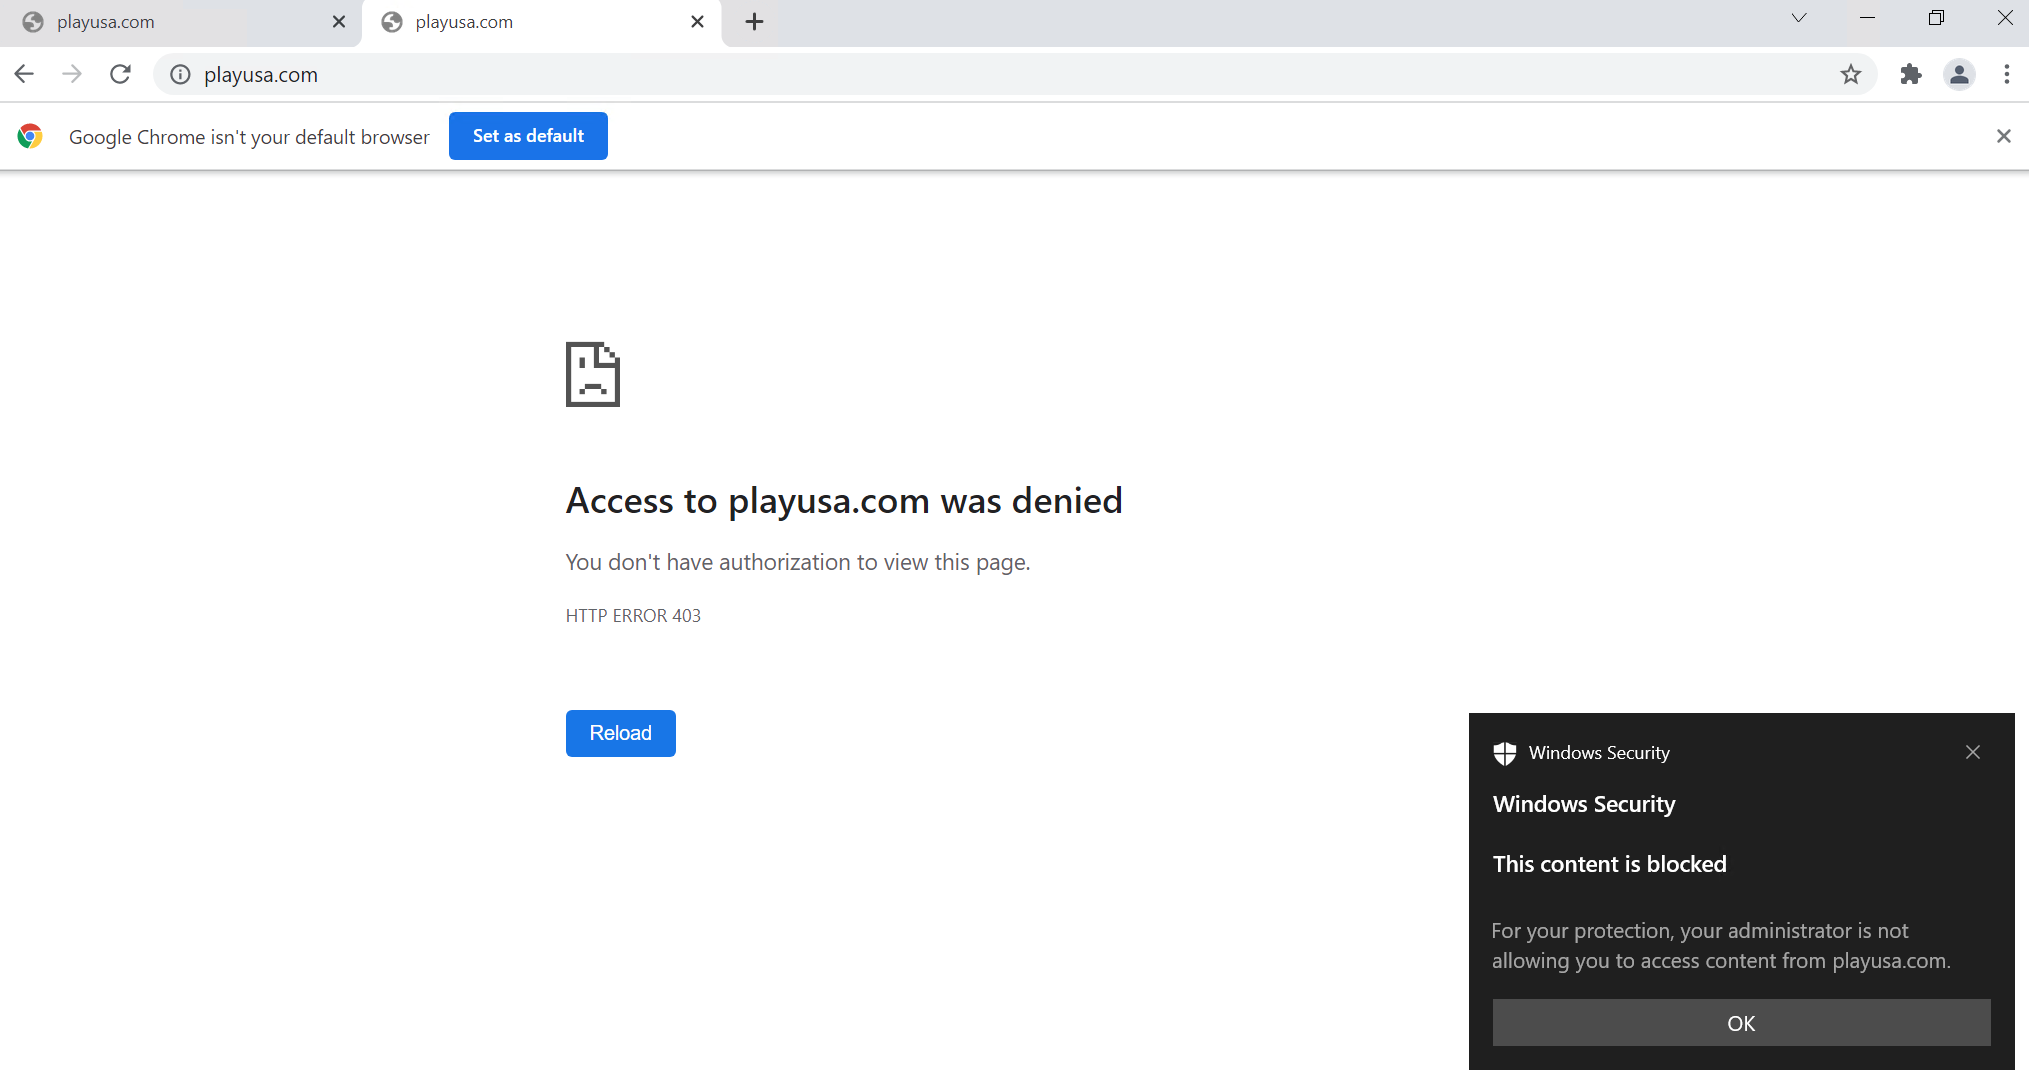
Windows Security Notifications will also show an alert if a website is blocked.

Custom Allow/Block of Websites
Defender for Endpoint allows you to explicitly block websites or explicitly allow websites that may be blocked in a category. The Custom Indicator overrides any category block.
Creating a Custom Indicator
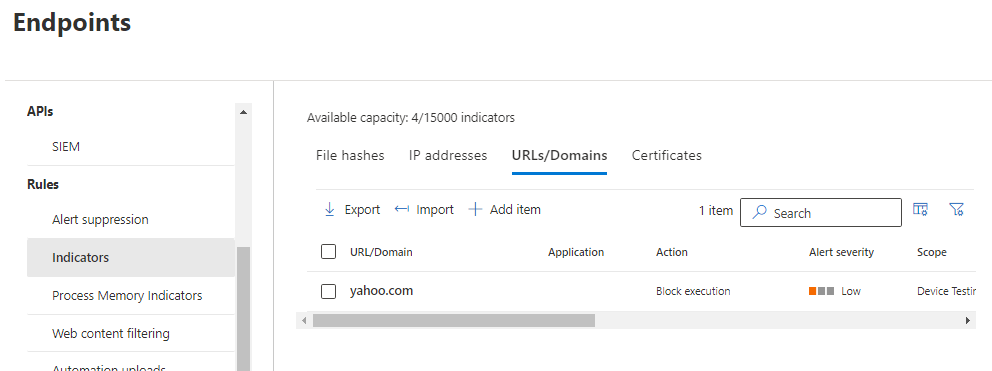
- Select Settings > Endpoints > Indicators (under Rules).
- Select the URLs/Domains tab.
- Click Add item.
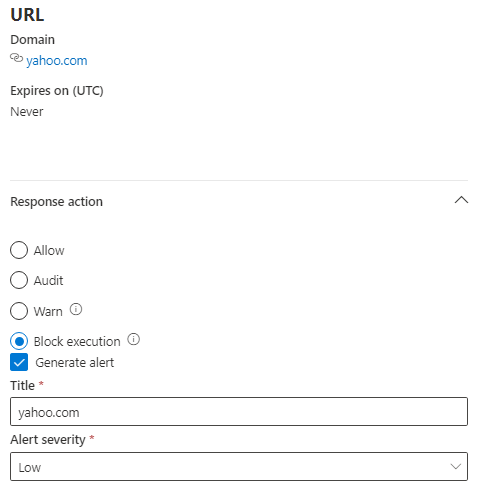
- Specify the following details:
- URL/Domain: Specify the URL or domain name you want to allow or block.
- Enter a name for this rule in the Title.
- Enter a description of the rule in the Description.
- You can set an Expiration or leave it as Never.
- Response Action: Select either Allow or Block. You can also select Warn or Audit for logging purposes.
- Organization Scope: Select either All Devices in my Organization or Specific Machine Groups.
Once you save, it will take about an hour to propagate to machines.
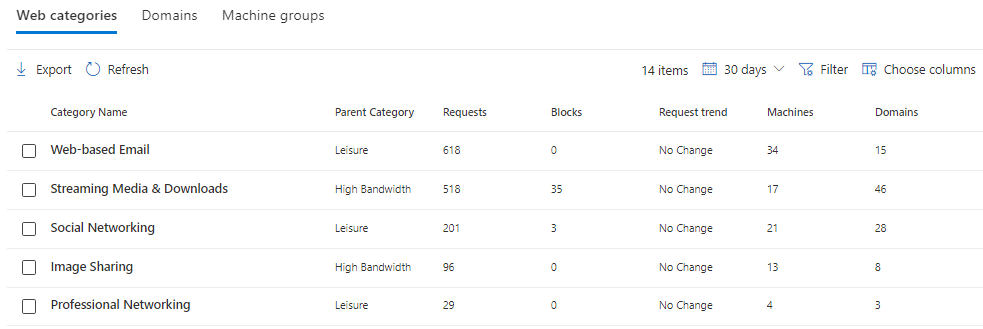
Content Filtering Reporting
The Microsoft 365 Defender Portal does not provide a lot of reporting on web activity, but it does provide some details to help with understanding Content Filtering activities.
Select Reports > Web Protection (under Endpoints). You can view graph reports of Web Threats, Malicious URL blocking, and general Web Request details.
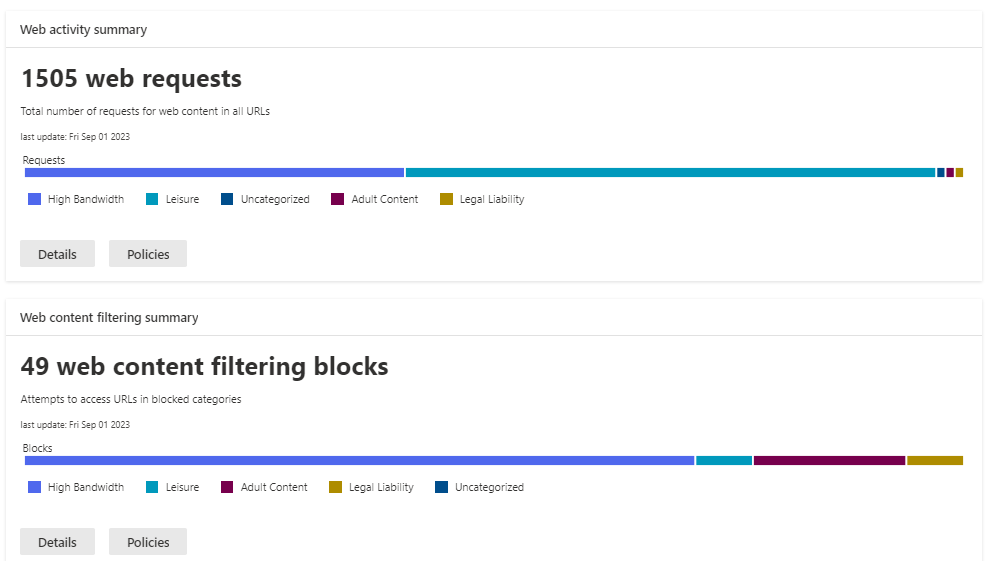
Most of the graphs allow you to drill down into more details. These reports also allow you to export the details to Excel.
Frequently Asked Questions
Can you create custom categories?
No, but you can override the Category action using a Custom Indicator for the URL.
Can you warn instead of block?
Not directly, but you can create a Custom Indicator that is set to Warn or Audit. The Custom Indicator will always override the Category block.