Overview
Securing Microsoft 365 tenants involves implementing various measures to protect data, prevent unauthorized access, and mitigate potential threats. There are several different improvements you can make, with different levels of complexity. In this article, we’re going to focus on several basic improvements that have the most valuable outcomes. These suggestions are based on having Entra ID P1 and Defender for Office Plan 1. The suggestions are focused on Identity Protection, Email Security, and Application Security.
By following these security recommendations, you can enhance the basic security posture of your Microsoft 365 tenant and better protect your organization’s data and resources.
Identity Protection
Enable Conditional Access to Block Legacy Authentication
Legacy authentication does not support multifactor authentication (MFA). Even if an MFA policy is configured in your environment, bad actors can bypass these enforcements through legacy protocols.
- Sign in to the Microsoft Entra Admin portal.
- Browse to Protection > Conditional Access.
- Select Create new policy.
- Give your policy a name.
- Under Assignments, select Users or workload identities.
- Under Include, select All users.
- Under Target resources > Cloud apps > Include, select All cloud apps.
- Under Conditions > Client apps, set Configure to Yes.
- Check only the boxes Exchange ActiveSync clients and Other clients.
- Under Access controls > Grant, select Block access.
- Confirm your settings and set Enable policy to On.
- Select Create to create to enable your policy.
Enable Conditional Access to Require MFA
Multifactor authentication (MFA) helps protect devices and data that are accessible to these users. Adding more authentication methods, such as the Microsoft Authenticator app or a phone number, increases the level of protection if one factor is compromised.
- Sign in to the Microsoft Entra Admin portal.
- Browse to Protection > Conditional Access.
- Select Create new policy.
- Give your policy a name.
- Under Assignments, select Users or workload identities.
- Under Include, select All users
- Under Exclude, select Users and groups and choose your organization’s emergency access or break-glass accounts.
- Under Target resources > Cloud apps > Include, select All cloud apps.
- Under Access controls > Grant, select Grant access, Require multifactor authentication, and select Select.
- Confirm your settings and set Enable policy On.
- Select Create to create to enable your policy.
Set Passwords to Never Expire
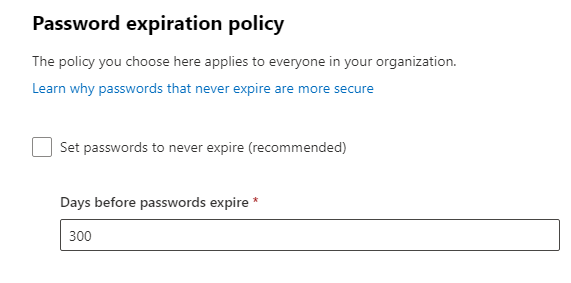
Research has found that forcing most users to change their passwords periodically results in users choosing weaker passwords. Its recommended to set passwords to never expire.
In the Microsoft 365 admin center, go to Settings > Org Settings > Security & privacy > Password expiration policy. Then check the box “Set passwords to never expire (recommended)”.
Enable Self-Service Password Reset
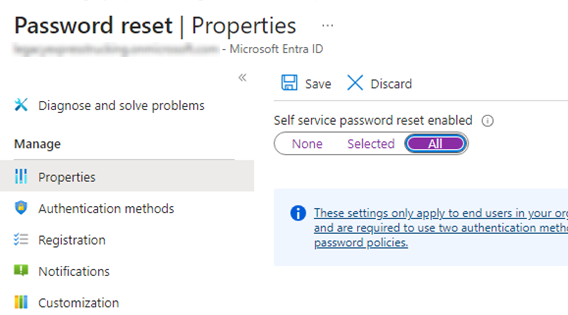
Self-service password reset in Microsoft Entra ID allows users to manage their own password. Users no longer need to engage a help desk to reset passwords, and allows them to reset their password as needed.
- Sign in to the Microsoft Entra admin center.
- Browse to Protection > Password reset from the menu on the left side.
- From the Properties page, under the option Self service password reset enabled, choose All.
- Select Save
Email Protection
Adjust Advanced Phishing Threshold
A higher Advanced phishing threshold value applies more severe actions on phishing detections.
In the Microsoft Defender portal, navigate to the Email & Collaboration > Policies & Rules > Threat Policies > Anti-phishing policies.
Open the Office365 AntiPhish Default policy. Edit protection settings.
Change ‘Advanced phishing thresholds’ from ‘1’ to ‘3’
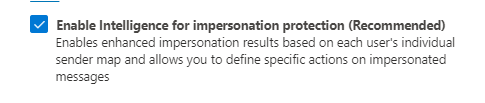
Enable Intelligence for Impersonation Protection
In the Microsoft Defender portal, navigate to the Email & Collaboration > Policies & Rules > Threat Policies > Anti-phishing policies.
Open the Office365 AntiPhish Default policy. Edit protection settings.
Change ‘Enable Intelligence for impersonation protection (Recommended)’ from ‘False’ to ‘True’
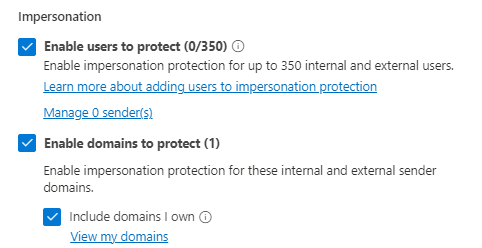
Ensure that all users have an assigned anti-phishing policy with ‘Enable domains to protect’, ‘Include domains I own’ and ‘Include custom domains’ options enabled, by either updating your existing policies or creating new ones.
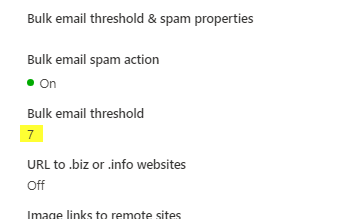
Adjust Anti-SPAM Threshold
In the Microsoft Defender portal, navigate to the Email & Collaboration > Policies & Rules > Threat Policies > Anti-spam policies.
Open the Block Domain policy (repeat for the Anti-spam inbound policy (Default) policy as well).
Change ‘Bulk email threshold’ from ‘7’ to ‘6’
Enable External Message Tagging
External Tagging adds a tag to any email message sent from an external domain. This makes it easier for users to identify a potentially malicious email.
Steps to Enable
Run Windows PowerShell as administrator and connect to Exchange Online PowerShell.
PS C:\> Connect-ExchangeOnline
Enable external sender identification in supported versions of Outlook. Run the Set-ExternalInOutlook cmdlet.
PS C:\> Set-ExternalInOutlook -Enabled $true
Now that it’s enabled, you can verify by running the Get-ExternalInOutlook cmdlet.
PS C:\> Get-ExternalInOutlook | Format-Table
Enabled: True means the feature is enabled; False means the feature is disabled.
Application Protection
Ensure User Consent to Apps is Not Allowed
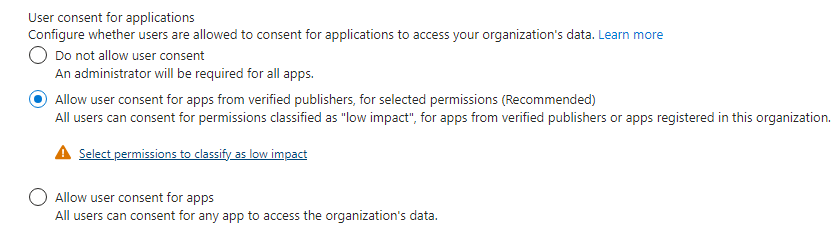
To reduce the risk of malicious applications attempting to trick users into granting them access to your organization’s data, it’s recommended that you allow user consent only for applications that a verified publisher has published.
- Go to Microsoft Entra ID > Enterprise applications > Consent and permissions. Go to Consent and permissions
- Select “Allow user consent for apps from verified publishers, for selected permissions (Recommended)“ Configure the low-impact permissions that users are allowed to consent to. Click “Select permissions to classify as low impact”.