
If you already have Azure Sentinel configured to receive logs and events from your endpoints and services, you’re already detecting potentially malicious events. Sentinel has dozens of out-of-the-box Analytics Rules. But if you’re ready to amplify your Sentinel threat detection, you should look at enabling a threat intelligence feed.
A Cyber Threat Intelligence feed provides multiple indicators of compromise (IoCs) to Sentinel in periodic updates. This allows for Sentinel to begin detecting new IoCs as soon as they become available. The IoCs typically include known malicious IP Addresses, URLs, and File Hashes. These IoCs can be correlated against Sentinel’s event data, which can dramatically improve your existing detections’ efficacy rate. Threat intel feeds are provided by a Threat Intelligence Platform, which combines multiple feeds into one unified feed. Sentinel supports several different TIPs, including MISP, ThreatConnect, and Palo Alto MineMeld.
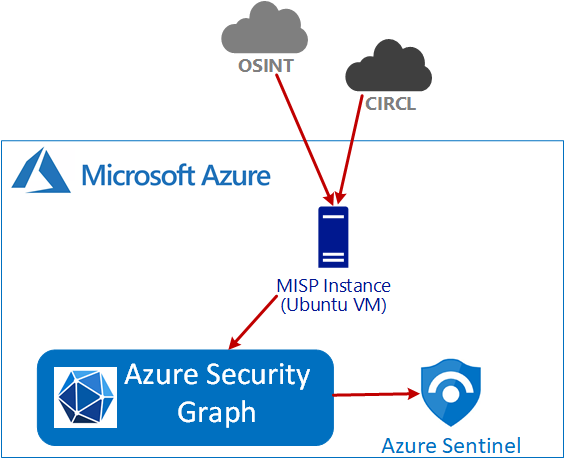
In this article, I’m going to focus on integrating MISP with Azure Sentinel. MISP is an open-source threat intelligence platform, so it is easy to get started with and gives you access to dozens of feeds. But other TIPs can be integrated similarly. Several articles from Microsoft and MISP detail the integration, but I found that all of them missed a key detail. I’ve included some reference links at the end. The primary work is to set up the MISP TIP on an Azure VM and configure the feeds.
Create an Azure AD App Registration
The first step is configuring an Azure AD App Registration that MISP will use to push IoCs into the Azure Security Graph.
In Azure Active Directory, navigate to App Registrations, and click New Registration. Name the Application: “MISP – Threat Intel Platform” and click Register.
Configure Permissions
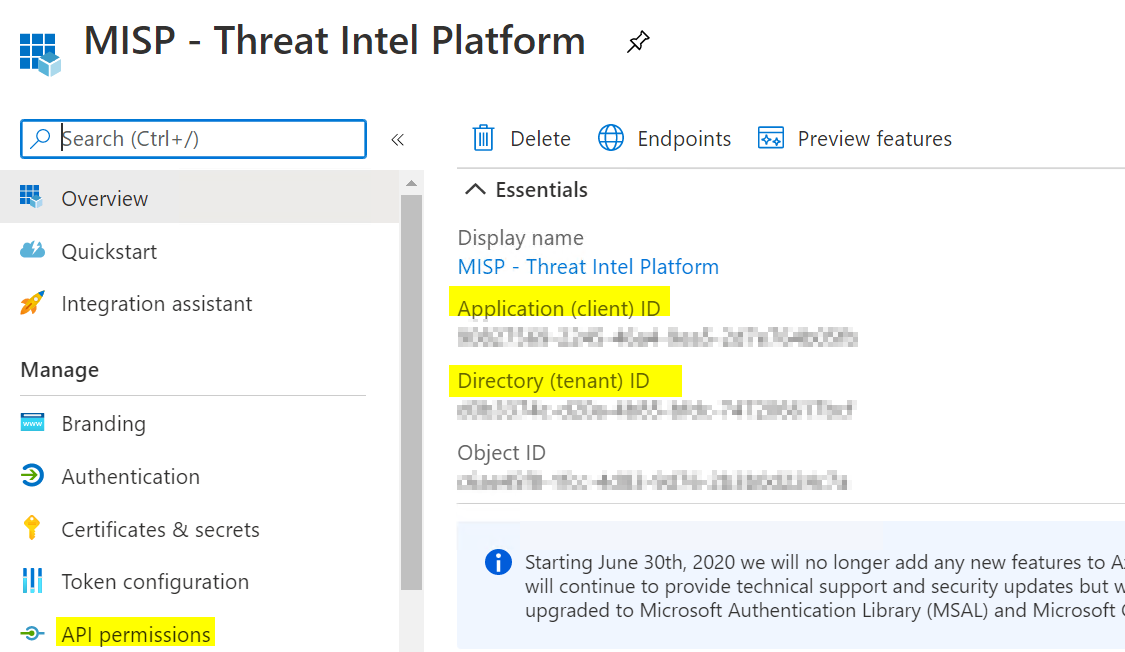
 Click on the newly created Registration and then click API Permissions from the navigation bar. Click Add a permission. Click Microsoft Graph, click Application permissions. In the search box, search for “ThreatIndicators.” Check the box next to ThreatIndicators.ReadWrite.OwnedBy. After you Save, click Grant admin consent. When you are done, it should look like this with Green checkmarks.
Create Secret
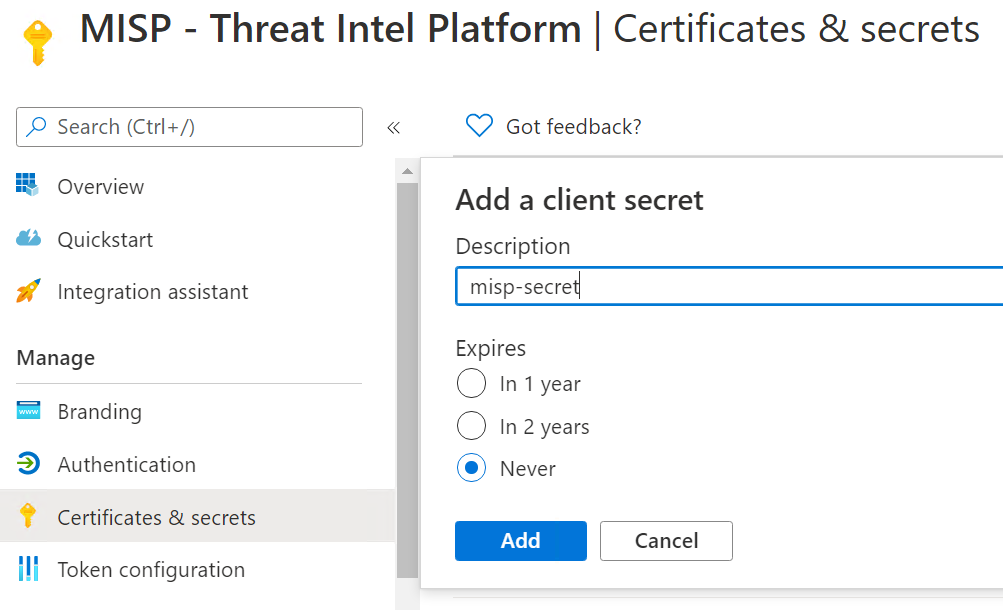
An API secret is needed to allow the export script to authenticate to Azure Grapth. In the MISP – Threat Intel Platform App Registration, click on Certificates & Secrets. Under Client Secrets, click New client secret. Provide a description for the secret and set an expiration on the secret; click Add. Copy the value now. It will not be available in the future. You’ll need this in a later step.
Create an Azure VM Instance
We need to configure a Virtual Machine to host the MISP instance. You could also host this in a data center or on an existing Linux VM if you have one. We’ll create a small Ubuntu Virtual Machine in Azure. I used a Standard B2s (2 vcpus, 4 GiB memory). Once the VM is created, remember to restrict SSH access to your IP address.
SSH into the VM and download the install script from Github.
wget -O /tmp/INSTALL.sh https://raw.githubusercontent.com/MISP/MISP/2.4/INSTALL/INSTALL.shRun the install script to install the MISP instance.
bash /tmp/INSTALL.sh -c -M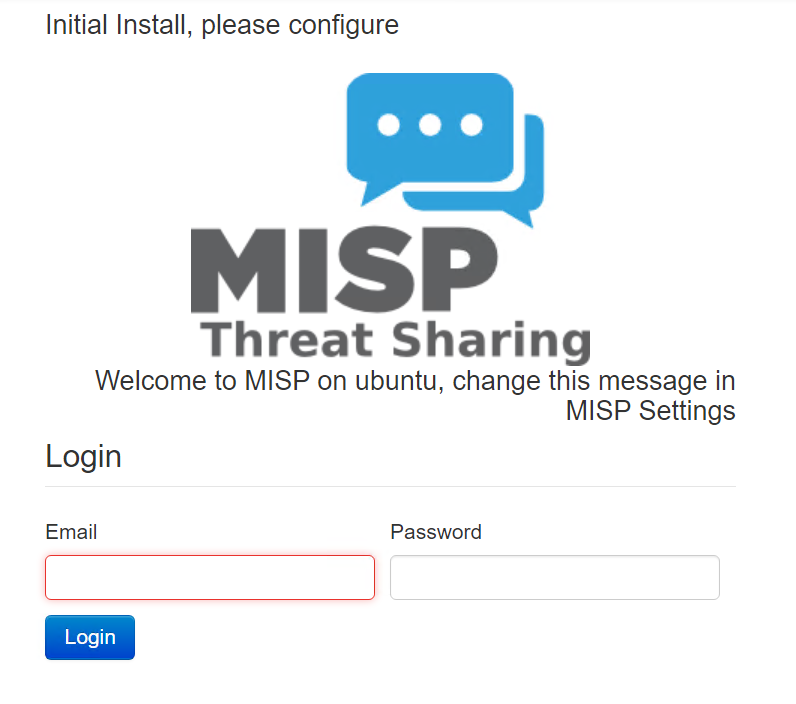
Configure MISP
Once the install setup is complete, you can begin configuring it via its web interface. You should able to access the web interface using the VMs IP address or DNS name, and log in with the username and password that was created during the setup.
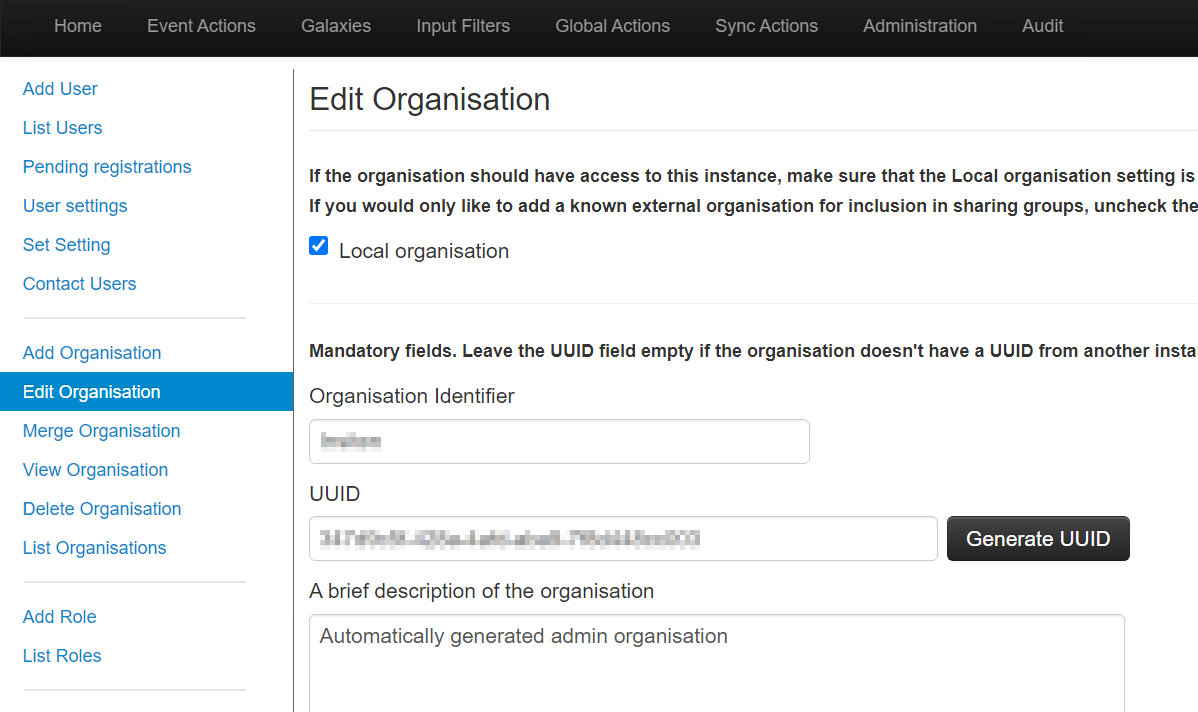
Change the admin password from the default. Under Administration, edit the Organization, set the Organization name.
Add Activity Feeds
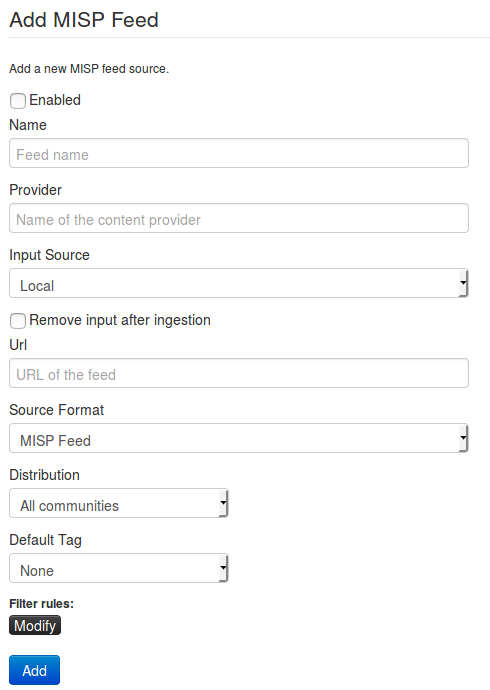
Feeds are structured lists containing indicators that MISP can automatically import based on a regular schedule. Feeds are structured in either the default MISP format, CSV format, or a free-text format. Feeds can be imported into your MISP instance using a URL.
Recommended Feeds:
You can find a list of all published feeds at https://www.misp-project.org/feeds/.
From the Sync Actions menu, select List Feeds. Click Add Feed from the side menu. Populate all the feed details in the form and click Add Feed.
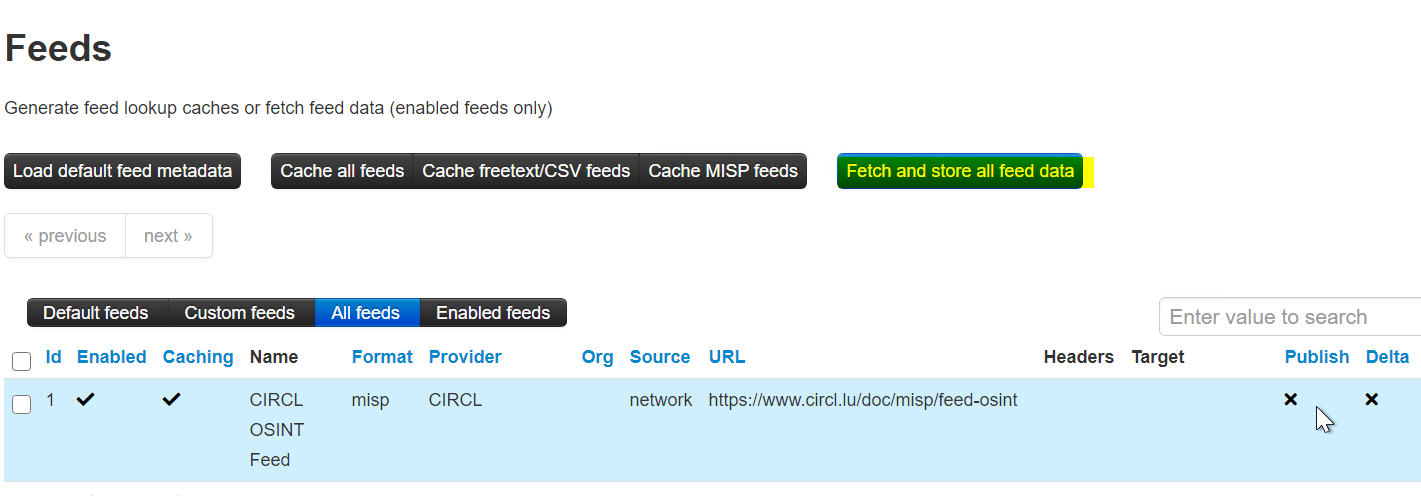
Once the Feeds are added, make sure you click Fetch and store all feed data.
MISP REST API
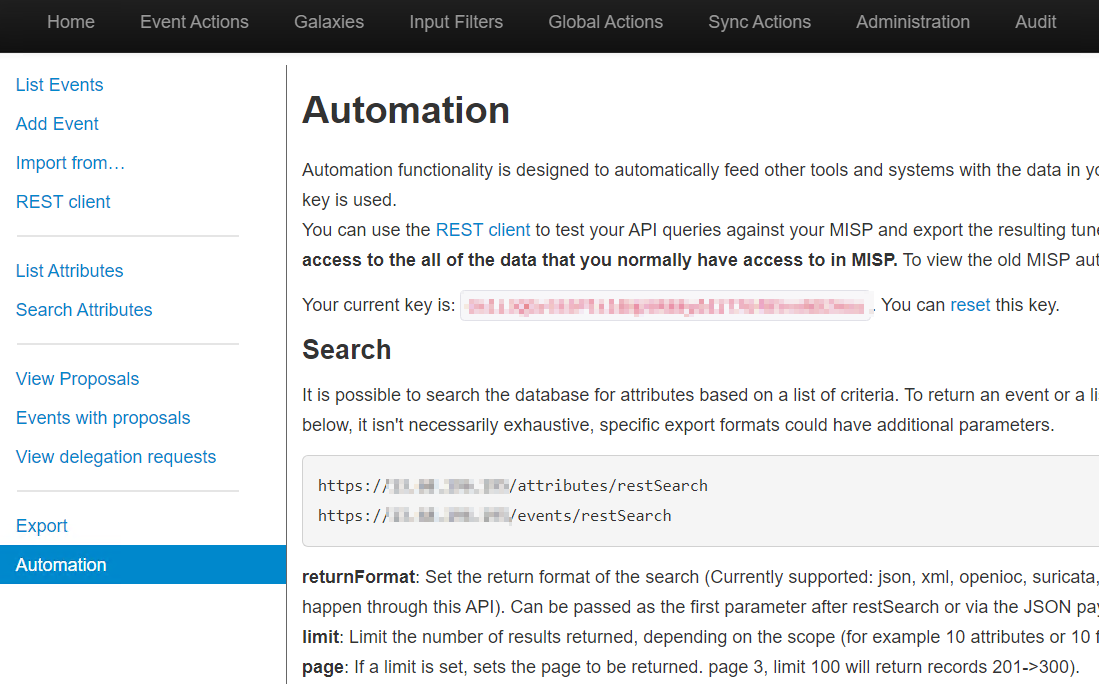
You need to get the MISP API key to use in the Export Script. In the MISP web interface, navigate to Event Actions > Automation, and get the API key to connect to the MISP API. You will need this in the next step.
Setup Export to Azure Graph
The next step is to configure a script to push the indicators from MISP into the Azure Security Graph. Run the following commands to download and configure the script.
sudo apt-get install python3-venv

python3 -m venv mispToSentinel

cd mispToSentinel

source bin/activate

git clone https://github.com/microsoftgraph/security-api-solutions

cd security-api-solutions/Samples/MISP/

pip install -r requirements.txt
Configure the Script
Run nano config.py to edit the Python file.
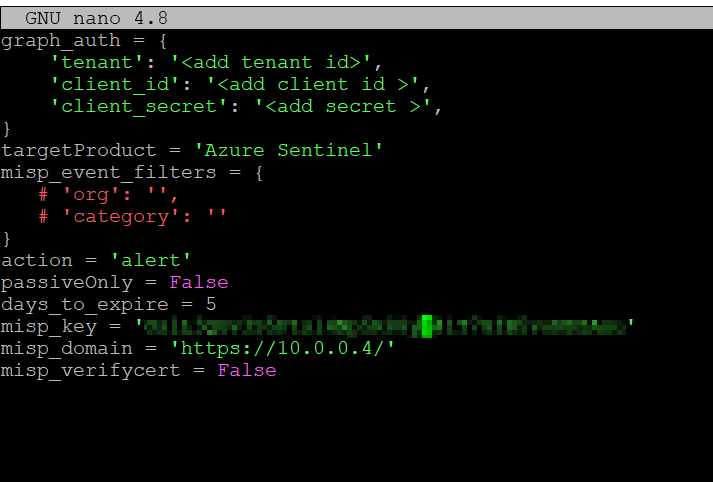
Populate the Azure details and MISP Key that you gathered in the earlier steps.
Tenant: Azure Tenant (Directory) Id
Client Id: Client Id from your App Registration
Client Secret: Client Secret you created in the App Registration
Action: alert
MISP_Key: API Key from MISP
MISP_Domain: The private IP of your MISP instance. You can use a public DNS name or IP if necessary.
Execute Script
Run python script.py to execute the export script. It will probably take several minutes to run.

Schedule Script
Run crontab -e to edit your Crontab Entries.
Add the following entry to execute the export script every day at 2 AM.
0 2 * * * /opt/MISP/jobs/Sample/python script.py
Configure Azure Sentinel
After running the export script initially, it is recommended to wait about an hour for the data to show up in the Security Graph. Afterward, open Data Connectors in Azure Sentinel. Locate the Threat Intelligence Platforms connector, and click the Open Connector page.
Scroll down and click Connect. Click on the Analytics Templates and create Analytics Rules for the relevant templates for your organization.

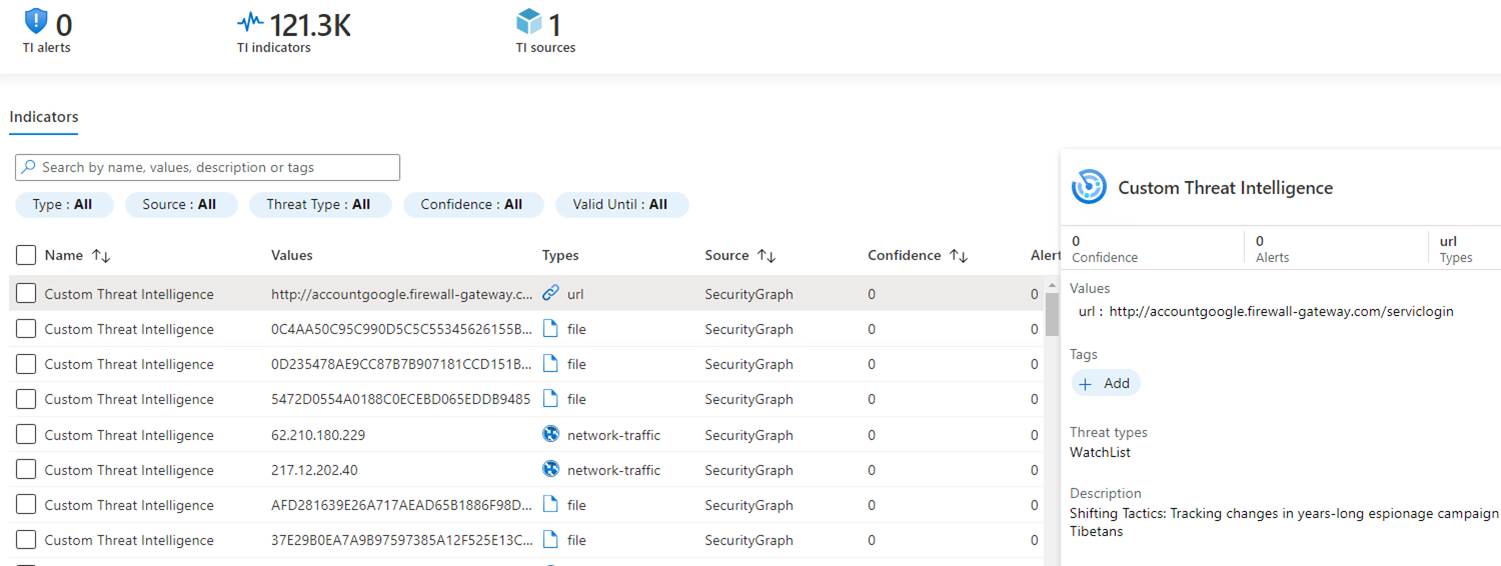
To confirm the Indicators are available to Sentinel, check that they are present. In the Sentinel menu, select Threat Intelligence, and you should see thousands of Indicators.
More Information
There are a number of additional articles that can help you configure MISP with Sentinel.
If my MISP locates at my data center. Do I need to open a firewall communication for incoming traffic from outside to my MISP if I need to integrate with Sentinel ?